Difference between revisions of "Howto:calendar invite"
Jump to navigation
Jump to search
Tag: visualeditor-wikitext |
Tag: visualeditor-wikitext |
||
| (8 intermediate revisions by 2 users not shown) | |||
| Line 1: | Line 1: | ||
== Step One== | ==Step One== | ||
* The first thing you're going to need is a google account. | |||
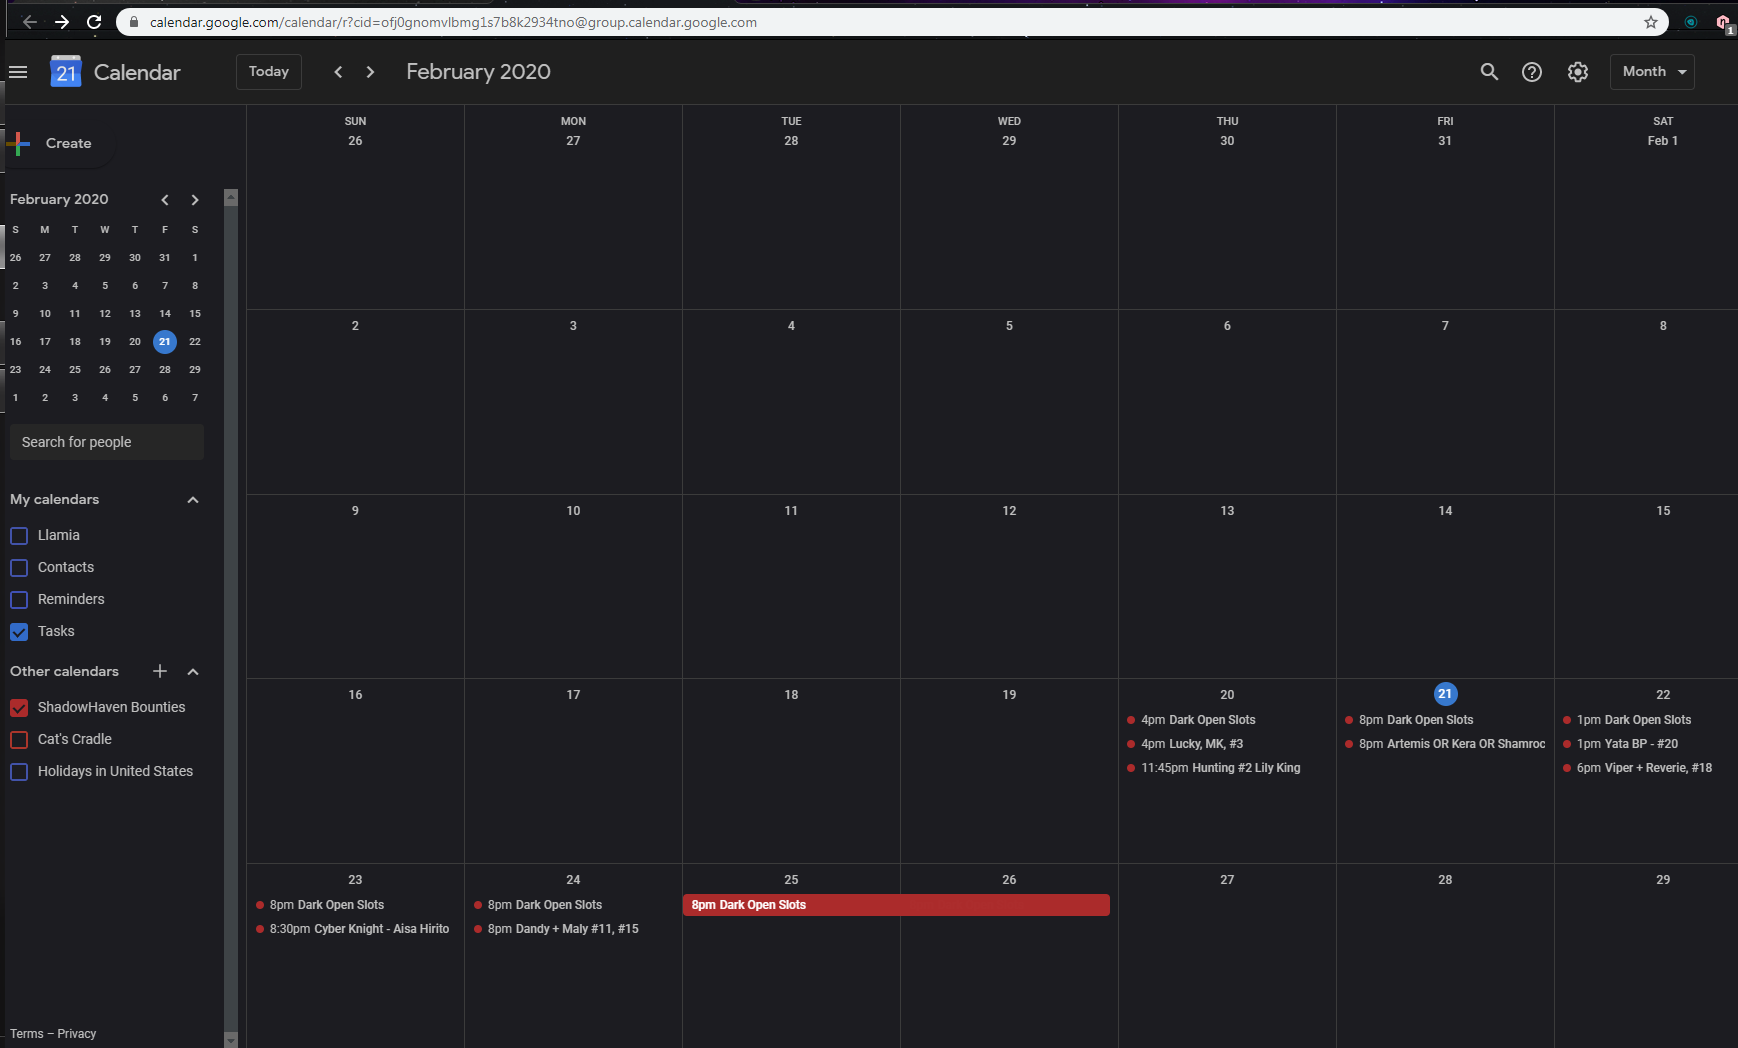
1. Open the calendar. | |||
2. Set it to month view. It should look something like this: | |||
[[File:Google Calendars Start.png]] | [[File:Google Calendars Start.png]] | ||
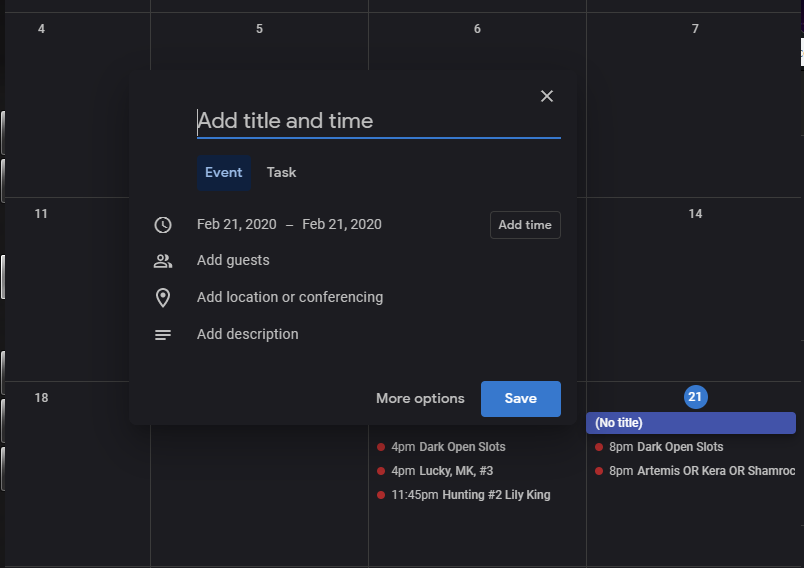
==Step Two == | ==Step Two: Creating an event== | ||
* Google calendars allows you to click on any day of the week to create an event. Do this | |||
[[File:Create Event.png]] | [[File:Create Event.png]] | ||
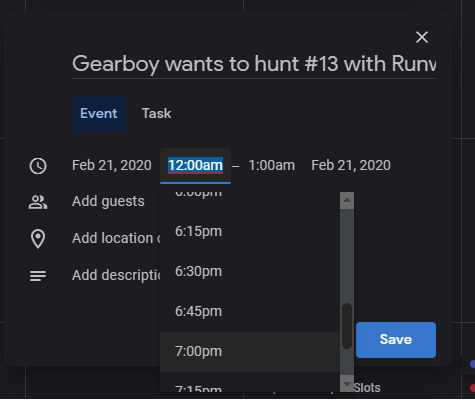
==Step | ==Step Three: Select your timeslot== | ||
* Agree upon a time-slot with your party, and arrange a three hour block on the schedule by opening the drop down menu, and selecting the proper times. | |||
[[File:Change time.png]] | [[File:Change time.png]] | ||
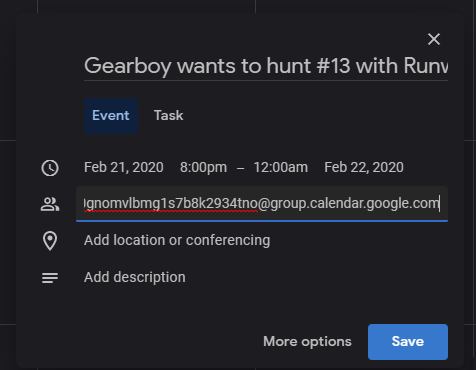
==Step Four== | ==Step Four: Add the calendar as a guest== | ||
Click '''ADD GUEST''' | |||
In the provided space copy paste: | |||
ofj0gnomvlbmg1s7b8k2934tno@group.calendar.google.com | |||
[[File:Adding the vowels.png]] | [[File:Adding the vowels.png]] | ||
==Step Five: Click save event== | |||
After this step, your work should be done, and the calendar owner will be notified of your event. | |||
Latest revision as of 05:19, 22 February 2020
Step One
- The first thing you're going to need is a google account.
1. Open the calendar.
2. Set it to month view. It should look something like this:
Step Two: Creating an event
- Google calendars allows you to click on any day of the week to create an event. Do this
Step Three: Select your timeslot
- Agree upon a time-slot with your party, and arrange a three hour block on the schedule by opening the drop down menu, and selecting the proper times.
Step Four: Add the calendar as a guest
Click ADD GUEST
In the provided space copy paste:
ofj0gnomvlbmg1s7b8k2934tno@group.calendar.google.com
Step Five: Click save event
After this step, your work should be done, and the calendar owner will be notified of your event.


